MYT CR8TiV

A Place to Enhance and Inspire to be CR8TiV !

Stay Updated by following me @ Instagram & Facebook …

xklj537508327

Facebook: Facebook.com/MYTCR8TiV

Instagram: @MYTCR8TiV

Wow ! Where have I been ? I didn’t realize that the last time I posted a blog post was in March ? I haven’t found time to post as much as I wanted to since I started working at my 1st job in October 2016. There’s so much I would like to share with you guys but I don’t know where to start. I’ve gained a pretty good amount of Brush markers to do a better Brush marker comparison post for you guys for brush-lettering which I’ve been practicing.

My Birthday was last month and my fabulous BFF gifted me the Studio Blick 96 color Marker set which I wanna do a Copic marker comparison post but the one issue with that is … I need to get a small Copic marker set to do a proper comparison. I was told Michaels does accept coupons for their small six(6) Copic sketch sets. So I’m thinking between the Perfect Primaries set or the Pale Pastels set. But I’ll get them when I have money to spare.

You know I originally set out to look for my 1st job so that financial situations will bet better and my Husband won’t have to be the solo income provider but even though I now have a job it’s funny we’re still broke all time with all the bills and rent. But I’ll save the Life ranting for my personal blog page which is … WordPress.com/PsychoBabblesBlog if you’re interested.

But anyways I am pretty mainly active on my Instagram posting up photos of my recent works so be sure to follow me there and I do post up onto my Facebook as well but I am more active on my Instagram. So when I have the money to get that Copic marker set you can bet your baby’s bottom I will post up a comparison to the Studio Blick set.

Umm … I can do a comparison with the Promarkers but the thing is the review/comparison wouldn’t be very accurate since the two are different. I mean they’re both Art Markers but the nibs are different. Promarkers are more felt broad tipped and not too flexible where as these Studio Blick are Brush tip more flexible. Promarkers would be more better comparable to the Prismacolor Art Markers which are on my WishList as well.

So this post is generally just to let you all know … I am still alive ! I haven’t abandoned this blog or that this blog site is a dead one. It’s very much still alive just haven’t had the time nor energy nor money to keep up with the postings. My dream though to one day have a YouTube channel where I can do video tutorials, live art creations, and what not still simmering on the back burner. My dreams to also have an active and successful Etsy shop or Online shop where you can purchase my Art is also simmering on the back burner.

Hopefully the next year or two will put me in a better place financially to be able to take those dreams off the back burner and into the fore-front. Till then Thank you all for the wonderful comments, encouragements, and continued support. You guys are all Amazing and Awesome followers ! I love you all very much so !! A BIG VIRTUAL HUG TO YOU ALL !! 0==( ∩⌂∩)==0

Leave a comment »

Taking Art on the Go … *UPDATE*

Lenovo-Tab-3-7

Hi, everyone !! So this is an update to my previous post regarding the Wacom Bamboo Slate. Today my husband was being a bit generous and along with the Wacom Bamboo Slate Small he let me purchase this Lenovo Tab3 8 tablet. I plan to use it along side the smaller sized Bamboo Slate for Art on the go or while on my work break periods.

One thing I immediately noticed one I paired the Bamboo Slate to the Lenovo Tablet was that the image shows up very jagged and the drawing marks I made aren’t smooth clean lines like when I paired my 1st Bamboo Slate Large with my Alcatel Idol 4 Smartphone. I do currently have my tablet plugged into it’s charger so I don’t know if that is the cause of the drawings coming out with jagged lines. But gimme one second to unplug it from the USB charger and see if it makes any difference.

stay-here-i-will-be-right-back.jpg

Ok, I am back ! Hmm … So even after I unplugged the USB cable it drawing I tested out still came out very jagged compared to my Idol 4 Smartphone where the drawn lines were very smooth. I don’t think it has to do with the Bamboo Slate itself but possibly that the results differ from Gadget to Gadget. So if you bought the Bamboo Slate Large or Small and finding your drawing or writing on your Tablet or Smartphone is coming out jagged it’s not a faulty Bamboo Slate. Try using it onto a different device.

Anyways a mini review of the Wacom Bamboo Slate Small is that there isn’t much of a difference between the Large size except for well the size difference. Like I said in the previous blog post the Large is a A5 Paper pad size so a 9″x11″ size where as the Small is A4 size so about a 5×6 size. I find the 5×6 a little bit easier to tote around in a backpack or totebag than the Large size. So if you’re looking for Art on the go … Grab yourself a Small Tablet and the Small Bamboo slate.

I’m not sure how to fix the jagged lined transfer issue but I will post an update if I find out why or how to fix the jagged line issue.

Leave a comment »

Taking Art to the next level … (•ᴥ•)

Hey, Everyone ! Wow !! It’s been awhile since I last made a blog post !! Looking back it says my last post was in January. Guess not too long ago but sorry I don’t blog as often as I want to about things but I am active in posting up my Art creations on Instagram and Facebook mainly Instagram though.

Umm … I can’t remember if I shared a Life update in previous blog posts but I am now working at my 1st job which I’ve been almost 6 months since I started. It took a bit of an adjustment to transition from being a 20+ yrs unemployed stay-at-home hermit crab to a busy awkwardly social employee. Took a lot outta me to give up my comfort of sleeping as long as I wanted, waking up whatever time I wanted, and have all the time in the world to just create inside my little bubble I call home.

I admit my social anxieties, general anxiety, self-issues, lack of self-confidence, and other negativities about myself are a struggle at times when things get real crazy but it’s a learning curve. I gotta learn to grow armor for working in the retail world bcuz I’ll be honest with you some customers aren’t the most pleasant species to deal with. Some you wonder if they even have a brain or soul at all.

But this post isn’t about my Work Life … I do that on my personal blog *PsychoBabblesBlog.Wordpress.com if you’re interested in Workplace ramblings*. Today I wanted to blog about a loving gift from my Husband. He bought me the Wacom Bamboo Slate last week and it is the most awesome gadget I have to own ! So what the Bamboo Slate essentially is … is it’s a smart pad of paper with a smart pen attached. What you write on the paper syncs into your phone or tablet or pc via Bluetooth connection. So what you wrote get’s automatically digitized and saved into your device.

Soon as I opened the box up in the car I was first taken back by how HUGE the Large size is ! I think it’s a bit bigger than a A4 9×11 sheet of paper so generally the size of a standard sketchbook. Kinda too BIG to carry in a backpack but they do have a smaller size which is A5 5×8 sheet of paper size which I plan to buy tomorrow.

The Bamboo Slate comes pre-charged I think fully charged as I haven’t had to charge it yet. The setup was real simple and I was able to get drawing instantly. There is an app called Wacom Inkspace that you need to download before you start. There’s a lot of negative reviews about it but I have yet to encounter any issues like any of the reviewers stated so it may have been updated or an isolation issue.

My favorite part about the Bamboo Slate is the Live-Mode ! In Live-Mode you can watch your drawing or writing appear like magic onto your Device you paired it with. If you plan to do digital art tutorial videos or anything this is perfect ! Just point your camera towards the device and draw off to the side off camera on the Bamboo Slate and what you drew on paper will show up on the device screen as you draw.

I have yet to try it but I read that you don’t need any special Wacom Bamboo paper pad. I heard that ordinary paper works just as well. You probably do need to buy pen refills as I’m sure there’s technology pieces in the pen to make the pad detect your writing but I’ll have to try it out with an ordinary pen and see if the sensors are just in the Slate surface itself or also contained within the pen but I have read that Rhodia pads are perfect when you run out of the Bamboo paper pad included.

I honestly just draw over what was already drawn on the paper pad to save wasting paper. The image you drew shows up on the device clean even if you’ve drawn over the previous images on the pad to where the pad is almost completely black in ink scribbles. 😛 One Con of the Bamboo Slate is it doesn’t seem to remember or hold Bluetooth sync. I have setup Bluetooth pairing each time I use the Slate. Which isn’t a BIG deal since it only takes a few seconds to pair and is super easy just a press of a button then confirm on connection on device. No biggie !

I wish I had a clean space dedicated for filming YouTube videos for you guys to see live examples instead of reading Dictionary length blog posts. But like I’ve said in past posts I will start making YouTube videos once housing situation gets better and I am able to have a dedicated Art studio/Craft room to do YouTube videos and be more cleaned and organized to show the rest of the world.

Anyways if you take a lot of notes and easily lose the paper you wrote the notes on then the Bamboo Slate is perfect for you or if you’re like me who has spur of the moment Art inspirations and you draw then lose the paper you drew on or it gets ripped or wrinkled in your backpack that you can’t get a nice photo to share it. This is great as it’s sync to your phone or tablet as you drew it.

Now one other Con I forgot to mention is that the Wacom Inkspace app doesn’t have any options to color in your add or do any further edits besides erasing some spots or adding more marks. I haven’t gotten the chance to try to see if I can add color and edit using a different Art app but I think you are able to. I’m still fairly *new* with tinkering with my Bamboo Slate and with my work schedule usually draining me out I haven’t created much lately.

I plan to get the smaller version tomorrow so I can take it with me to work and draw on my work breaks. But overall it is a really neat device ! I recommend you give it a try and use Price matching offers to your advantage to get it cheaper than the MSRP if you can.

Leave a comment »

I ♥ Layering Stamp Sets !

15970799_10157955572640307_1431630357_n

Happy day after Hump day, Everyone ! (ñ~ñ’) I actually started typing this on Hump Day but I didn’t notice the time as it hit midnight so no longer hump day. L0L But I hope your week is going by in positive ways. My week has been pretty busy with work that I haven’t had much time to CR8 but I try to find moments to squeeze some time in.

One Monday I think it was I received my monthly subscription stamp set from PaperWishes Stamps Only subscription kit which contained these Layering Dahlia stamp set. Last month it was the Layering Flowers stamp set. Both were gorgeous stamp sets !! Below is the Layering Dahlia stamp set which I received for the month of January ↓

imgg-php

How gorgeous is this stamp set ? I am slowly growing my layered stamp set collection and most of them are floral sets with I absolutely love !! Now here’s the Layering Flowers stamp set I got last month ↓
img-php
This stamp set is also gorgeous !! I highly recommend becoming a Stamps Only club member. The stamp set alone costs $17.99 but for the same price you can get a different stamp set each month and they never disappoint !! I am a forever subscriber to them !! Just letting you know I am not getting any rewards or royalties. This is pure personal opinion and experience based.

A few thing I highly recommend when using layered stamp sets is …

• 1.) A Stamping Tool whether a Misti or Stamp Perfect Tool: Having this tool makes aligning the layers so much easier and also if your first impression didn’t stamp well you can easily restamp again in the same position.

•2.) Multiple Inks in Light-Mid-Dark tones: You don’t really need to have multiple ink colors especially if you have a stamping tool like mentioned above. You can repeatedly stamp with the same ink color to make the tone darker than the previous. But it’s really nice to have multiple colors. If you’re on a tight budget … Michaels craft store brand CraftSmart ink pads are $2.99 each. I recommend using a coupon and buying the Colorbox Cat’s eye container that has 15 colors for $24.99 but with the coupon it can be as low as $15. Another good one is the Colorbox Paintbox set and the Petal Pack which gives you a good amount of color choices for the time being til you get a better set like the Altenew set.

•3.) Post-It note: The Post-It notes that have adhesive edge to edge is perfect to make masks for your stamping. If you’re using a floral layering stamp set you’d want to create a garden background or bouquet and the masking technique is one you’ll definitely need. (┬_┬) I’m not that good at fussy cutting so I’m hoping that someday I can afford the Brother Scan n’ Cut to help me cut out the stamp masks and stamps I don’t have dies for.

•4.) Baby Wipes: Baby wipes are an indispensable tool in your stamp arsenal ! I always buy a bundle pack of them. I like Huggies Simply Clean wipes but depending on the budget at that moment in time the $5 pack of Target’s Up & Up brand works well too. But you’ll definitely need them to wipe off the stamps, your hands, the stamping tool, etc.

Now that I own a few floral layering sets it makes me want to study flowers and what colors they come in. I’m a bit of a perfectionist and it would bother me to stamp a Fuchsia Poppy flower only to find out there aren’t such a thing in real life. It doesn’t really matter but I kinda like to keep the colors true to flowers you can see in real life. But overall I am really loving the Layered stamp sets and I hope to get some non-floral sets in the future like the Hero Arts Layered Goldfish stamp. They’re really fun and with a stamping tool really easy too !

Leave a comment »

Mini Misti .vs. HA’s Stamp Perfect Tool

Hello Everyone ! I hope you have had a wonderful New Years celebration. Many of you messaged me in how much anticipation you have for my product review post on the Mini Misti and Hampton Art’s Stamping tool. My husband got me these for Christmas online and my impression was pretty surprising. I have heard and seen about the Misti for so long and was happy to learn about the Mini Misti made specifically for cardmakers. So it’s been on my Wish List for quite some time.

So my husband ordered both from Amazon and the Mini Misti he ordered also came with two(2) ink pads: Blue and Black and two(2) embossing powders: Silver and Gold. The price is pretty decent for the fact that you get these extra items included. Below ↓ is the link to it if you wanna grab one yourself !

https://www.amazon.com/Misti-Stamp-Bundle-Embossing-Powders/dp/B01M302BBB/ref=sr_1_2?ie=UTF8&qid=1483407676&sr=8-2-spons&keywords=mini+misti&psc=1

The Hampton Art Stamp Perfect stamping tool was pretty amazing price wise and I have to say it surprised me as I’ve tried Hampton Art products before and they were always a terrible quality or product. But this has to be a One Up↑ for the Hampton Art company. Below ↓ is the link to that one as well !

https://www.amazon.com/Hampton-Art-Stamp-Perfect-Tool/dp/B01MXDHPN9/ref=sr_1_1?ie=UTF8&qid=1483407894&sr=8-1&keywords=hampton+art+stamping+tool

I’m going to start first by reviewing the Mini Misti. My first gripe which is minor is the fact that on packaging as well as online they show the Mini Misti has a Fuschia or Magenta pink color which I didn’t mind but when I opened the box what I got was a pale salmon pinkish orange colored Mini Misti. Color doesn’t really matter as far as performance but it does kinda bug me that the color is deceiving. So hopefully that doesn’t matter or bug you so much as it does for me.

Umm … the 1st thing I did was to take the magnets and wrap them in washi tape as I have read many comments about them sticking together and being unable to separate them. I have not had any issues with that or with them breaking *yet* but I can tell you it’s a BIG help to wrap them in washi tape or masking tape leaving a small tab to pull them apart of pick them up off the Misti surface.

Now for the stamping the back of the packaging says to remove the black foam sheet when using Clear Stamps and I mainly only own Clear stamps so for my 1st go I removed the black foam sheet and the grid paper sheets mat. (¬⌂¬) Uhh … no ! Leave the black foam sheet. Either my clear stamps or cardstock is flatter than most or ??? but when I removed the black foam the stamped surface would not touch the cardstock completely. It worked best with the black foam sheet in place. Either they got weaker magnets after the many complaints of broken magnets or magnets sticking to themselves and not coming off but the magnets seemed pretty weak to me and didn’t really keep my paper in place. One other issue I had was the Mini Misti didn’t close completely flush with the magnets in place so you needed to restamp your image a few times to make sure it completely transferred over.

Overall the Mini Misti does make stamping a lot easier and less fussy. Especially with layered stamps. I was able to better align my Altenew Vintage Roses stamp set a lot easier with the stamping tool and making multiple quantities was a breeze. I would recommend a Mini Misti but continue reading on before you place your order for one.

So now let’s move on to the Hampton Art’s Stamp Perfect Tool. This is my winner from the Product comparison. Like I stated above I was quite surprised by the Hampton Art product as from previous experience they weren’t that great. But the Stamp Perfect tool is AMAZING !! It is bigger than the Mini Misti !! The stamping surface of the Stamp Perfect Tool is actually the size of the Mini Misti. Below ↓ is a picture of the size difference and what I mean by how the stamp surface of the Stamp Perfect Tool is the size of Mini Misti. *Sorry for the poor lighting and picture quality*

15823977_10157909680615307_1950236930_o15824577_10157909680335307_188325555_o

15857806_10157909680145307_1249012709_o

You can see from the top photo that the size different is pretty dramatic. I’ve read reviews of people saying it’s a tiny bit bigger but that is not tiny !! I kinda like the larger surface as it gives you more space should you want to make larger cards than just an A2 size. I felt that this Stamp Perfect Tool outperformed the Mini Misti. The magnets stayed put, the stamping surface is larger, it closes completely flush, the flap that you apply your stamps on is a bit more flexible so you can press down to get a good impression whereas the Misti is kinda stiff and hard, it has a pleasant teal blue color like the photo on the box and online shows, and price wise it’s a lot more affordable than the Mini Misti.

I found the Hampton Art Stamp Perfect tool to be a lot better as it’s lighter, more flatter, and even though it’s a tad larger than the Mini Misti I feel like it’s less bulky to transport around in a backpack or messenger tote. Both overall performed equally well and does what it’s supposed to. Both are invaluable tools to have when mass producing cards and wanting to get the most outta your stamps. But I think to me I prefer the Hampton Art Stamp Perfect over the Misti. Everyone has different opinions and taste so if you’re on a tight budget and been wanting the Misti but can’t see yourself paying the price for one … Get the Hampton Art Stamp Perfect but if you have done your research and don’t mind paying the extra go for the Misti but possibly go with the original Misti over the Mini Misti so you have more surface space and card size options. The Mini Misti is definitely only for an A2 or 5×6 card base.

Well, hopefully this 1st product review of the 2017 year was helpful and if you have any questions about either of the products … Comment below and I’ll reply back the best I can. I’m planning to start working on comparison reviews for Brush Marker Pens next as well as Alcohol based markers since I have now acquired a few other brands than just Promarker. As always I thank you for viewing my blog, reading my posts, and liking/following my pages. In case you don’t know them and wanna give a peek … My Facebook page is : Facebook.com/MYTCR8TiV and my Instagram is @MYTCR8TiV Have a great week and a Happy, Healthy, and Prosperous 2017 !!

Leave a comment »

*MIA* Missing In Action …

stress-at-work

Happy Holidays everyone ! Wow !! I really can’t remember the last time I wrote on my CR8TiV Art blog. So many things have changed that I don’t have the time to blog and there’s a long list of things I wanted to blog about like Brush Marker pen comparisons as I’ve collected quite a few now … I also wanted to blog about Art subscription boxes as my BFF gifted me a subscription to Sketch Box. Also wanted to blog about the non-Art subscription box which is the Pusheen Box that my Sister gifted me a subscription to on my Birthday this year. So many things I want to share with you guys. I wish I could just think it and immediately get’s posted on here. L0L

Umm … my BFF got me the 150 color Primacolor Premier Colored Pencil set and Amazon has them on sale for really good deal right now so if you’ve been wanring them whether for yourself or as a gift … Nows the best time to get them as they’re just over $100 I believe. Normally this set will cost you like $200. If you follow me on Instagram @mytcr8tiv You’ll find me most active there. I do still post occasionally on my Facebook page but if you want to see my most recent works … follow me on Instagram.

Uhh … let’s see what else can I update you about ? Oh ! After almost 18+ yrs. of trying to get my 1st time job I got hired in October @ Walmart. I applied as a temporary seasonal but just on Sunday I found out that they are going to keep me. So that’s part of the reason I haven’t been so active on my blogs and posting on my sites. Work takes up my energy and time but when I am off like today I am busy trying to finish unfinished projects, squeeze some CR8TiV time in, all while trying to relax and enjoy my day off. The main issue is laziness where I just don’t feel like doing anything on my day off.

But I promise that soon I will get you updated and post up a comparison review of the Brush marker pens as I have a lot more to compare not like my previous post of Tombows and the Brush set I bought from Amazon. I know have Tombows, Pentel Touch, A few that came in the recent Sketch Box, Sharpie Brush, Kuretake Fudebiyori my Mom brought from Japan, and a few more that I can’t recall off the top of my head. I’ll create a detailed comparison of them soon.

I also just ordered my Christmas gift to myself which is the Mini Misti from My Sweet Petunia but also ordered the Hampton Art Perfect Stamp Tool which is pretty much a knock off version of the Mini Misti. I’ve heard the surface of the Hampton Art version is a wee bigger than the Mini Misti but I will definitely do a comparison post on those two as I am sure it’s a gonna be a popularly viewed on.

I’ll do my best to try and stay active in my blogs when I have the time to do so. I hope you all have a wonderful Christmas holiday and I deeply want to say Thank you to all the dedicated followers/subscribers for following my blog(s) and liking my Facebook posts. I am hoping that in 2017 I can push MYT CR8TiV™ towards a 2nd attempt at Etsy shop and sell many of the things I make as well as a destash of some stamp sets and supplies I have and no longer use. So I hope 2017 is prosperous and positive than the previous not just for me but for everybody !!!

Leave a comment »

Goodies from Japan … Thanks Mom ! (n_n)

Hi, CR8TiV Birdies !! So my Mom just got back from a trip to Japan and she always brings me back some goodies from Japan. This time she brought me some Kuretake, Tombow, and Sakura items. Yay !! \(n D n)/

13535988_10157003012780307_88674745_n

Umm … I’m not really sure how or what the Kuretake letter set is *Pictured above ↑*. I’m gonna have to clarify with her what it is. But I’m really loving all the items she sent me. The one I am really loving is the Kuretake Fudebiyori Brush pen set *Pictured below ↓*

13530599_10157003013875307_506516208_n

In case you don’t follow my Instagram or Facebook accounts *@MYTCR8TiV – Facebook.com/MYTCR8TiV* I’ve been getting into Hand-Lettering using Brush Pen markers. My last blog post was a product review/comparison between Tombow’s and Immersive Color Brush pens.

Now for these Kuretake Fudebiyori Brush pens they’re a lot like Tombow Brush pens and the Brush tip on them is very similar to that of Tombow as well. The medium stiffness of the Brush tip made it very easy to do Brush lettering. So if you are a beginner in Brush lettering I’d recommend trying the Kuretake Fudebiyori Brush pens. I know JetPens.com sells them and I’m sure you might be able to find them on Amazon. I was told that the Fudebiyori Brush pens are just Japanese versions of the Kuretake Zig Brush Pens here in the US. But since I haven’t tried Zig Brush pens, yet ! I can’t confirm that. I’ll get back to you on that once I get a set of Kuretake Zig Brush pens.

Umm … a short update to the Tombow .vs. Immersive Color post is I’ve been using the Tombow Brush pens more than the Immersive Color Brush pens as I stated in the review the Brush tip of the Tombow Brush pens are a bit more stiffer making thin strokes and thick strokes a bit easier where as the Immersive Color Brush pens the Brush tip is soft so you really need practice on the pressure to get the consistent thin and thick lines.

Anyways the next product my Mom got me were these Tombow highlighters *Pictured below ↓*

13552800_10157003013800307_1357809440_n

I did not even know Tombow had highlighter pens. But the chisel tip is perfect for doing calligraphy and the ultra-fine tip on the other end is great for journaling or planner writing and the colors are very vibrant ! I think I will use these for vibrant Florescent Doodle arts and Calligraphy of course.

On to the next items which is the Sakura Coupy-Pencil *Pictured below ↓*

13530419_10157003012720307_214444515_n

I’m not really sure what the Coupy-Pencil really are. They feel like long crayons without the wrappers. Each one is about 4½” long and come in 12 colors. I tried to see if they are colored pencils as they are called Coupy-Pencil but they feel very waxy like crayons. Only difference is unlike Crayola crayons that leave white spots when you color … these lay down a smooth even coverage of color.

Umm … as far as blending ? I tried to blend the colors into each other like I took Red and Yellow to see if it’ll blend into an Orange color but it didn’t blend at all ! I then took a cotton swab with Rubbing Alcohol to see if I can blend it out like I do with my Prismacolors colored pencils and they did not blend out or do anything at all. Next I tried using vaseline *Petroleum Jelly* to see if they’ll blend out with that … It also did not blend out or do anything. Lastly, I tried Baby oil and again it did nothing ! Oh and I tried a water brush to see if they are water soluble but like I suspected they are highly wax based bcuz all the water did was bead up on top of the area I colored aka water resist.

As far as coloring they work like ordinary crayons ! You can layer colors on top of each other but they don’t blend together via blending mediums or blending into each other. They just seem like ordinary crayons. Unless I’m wrong ! Comment below if you’ve used Sakura Coupy-Pencils and got them to blend or have other techniques for using them other than coloring books.

My Mom is still awaiting another large package of goodies shipped from Japan so I will definitely post up another post of what Goodies my Mom has brought back from her trip to Japan. Until then have a CR8TiV Summer, Stay Cool, Stay Hydrated, and I’ll post again reall soon !!


Leave a comment »

Brush Pen Review … Tombow .vs. Immersive Color

11111111

Hi, Everybody !! Happy Father’s Day weekend ! Hope you have something wonderful planned with your family this weekend. So today I am going to do another Product review and I believe this is going to be a very popular review. Hopefully the contents of this review will be helpful and useful to you. So let’s get started !! \( n 3 n)/

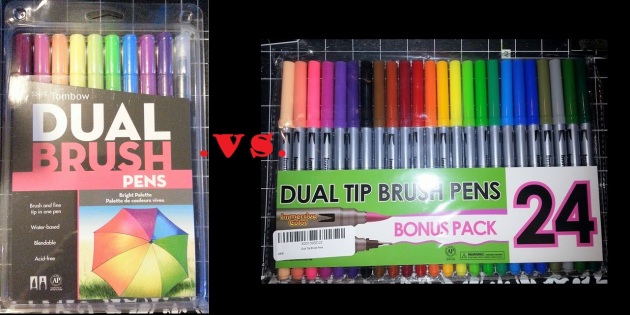
The review is on Brush pens and I am doing a comparison review on the Most Popular Tomwbow Brush Pens and a less known brand called Immersive Color Brush Pens. I have to say my reason for purchasing these Brush pens was first from my previous review about the Spectrum Noir Aqua markers being comparable to the Copics. I love the brush tip of the Spectrum Noir Aqua markers. I use the often for coloring in stamped cards and handrawn art.

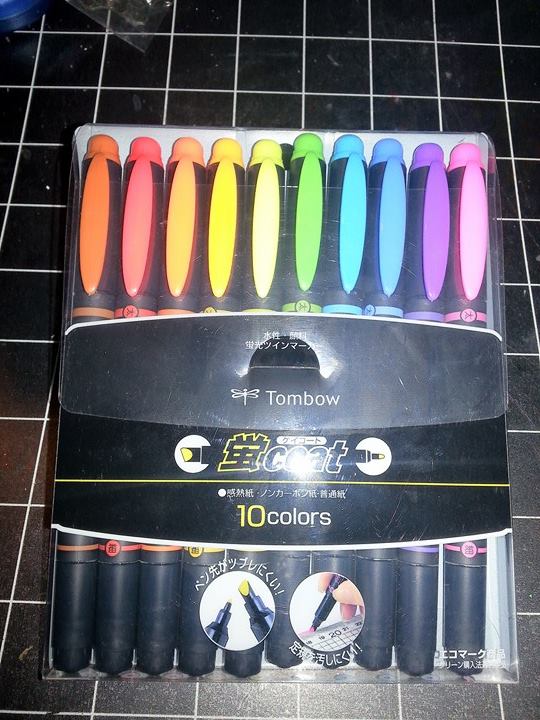
Now Brush Lettering seems to be a trending thing in the Hand-Lettering world. And the #1 Brush pen lettering pros use is the Tombow Brush pen. I have watched and followed enough Brush Lettering Artists on Instagram to get a general idea of Brush Lettering but I was never able to afford the Tombow markers. But thanks to my BFF’s help I was able to get the Bright set of Tombow markers !! \(n0n)/ YAY !!

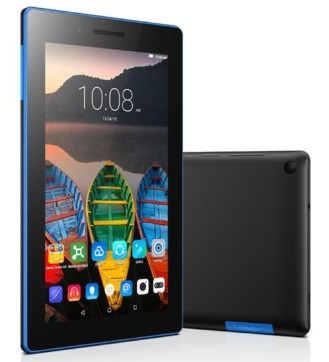
I ordered them off Amazon along with a 128gb SD Micro Memory card for my tablet which I previously did a review on. It runs a lot faster now ! So I also purchased a Travel Lap desk which I’ll do a review on later. But in order to qualify for the *FREE* Shipping on Amazon I needed to add something more. So I grabbed these Immersive Color Brush Pens they are $19.99. I am happy to create a side by side comparison review of these two(2) brands for you !! (n_n) Aww… I know I’m too kind ! L0L

So below is a bit of a comparison chart I made of the Tombow Brush Pens .vs. the Immersive Color Brush pens. ↓

Facebook-20160617-083521

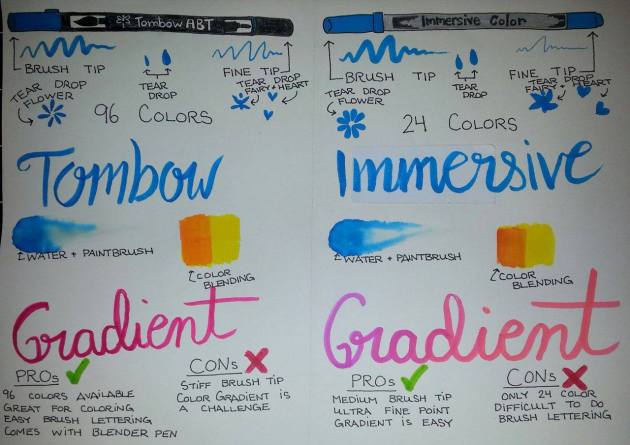
I’ll start with the Tombow Brush pens. I’m not really sure if it’s because they are Brand *New* but the brush tip on these pens feel a bit stiff. Also compared to the Immersive Color the Brush tip seems more Fine ? I guess you could say. If you look at the tear drop shapes examples I made which is done simple just by pressing the tip down on the paper. The size of the tear drop is quite small and narrow compared to the Immersive Color one.

Umm … I know there are 96 Tombow Brush Pen marker colors which is a nice variety of colors to chose from and I like color variety. The Fine tip end writes like a Fine point Sharpie marker and will be perfect for drawing in fine lines or details. Both Tombow and Immersive Color are water-based markers so they should blend nicely with both water and to themselves but I couldn’t get them to blend very well. With a water and a watercolor brush I was able to pull the color to sort of a gradient fade but trying to blending together Yellow and Orange didn’t blend together well if at all.

I have always adore the Brush Lettering words or quotes using the gradient effect where one color trails off into another. With Tombow Brush Pens I was told the technique is done by grabbing a lighter color and touching a darker color to the tip of the lighter color just for a few seconds. In my example above I grabbed a Pink/Magenta and Maroon/Burgundy color and the gradient effect didn’t work out too well.

Overall the Tombow Brush Pen is definitely easier to Brush Letter with as the stiffness helps when doing the thin line and thick lines in Brush Lettering. *Gotta practice more on that* But they are great markers for both coloring and lettering. But definitely Brush Lettering is easier with these Brush Pen markers.

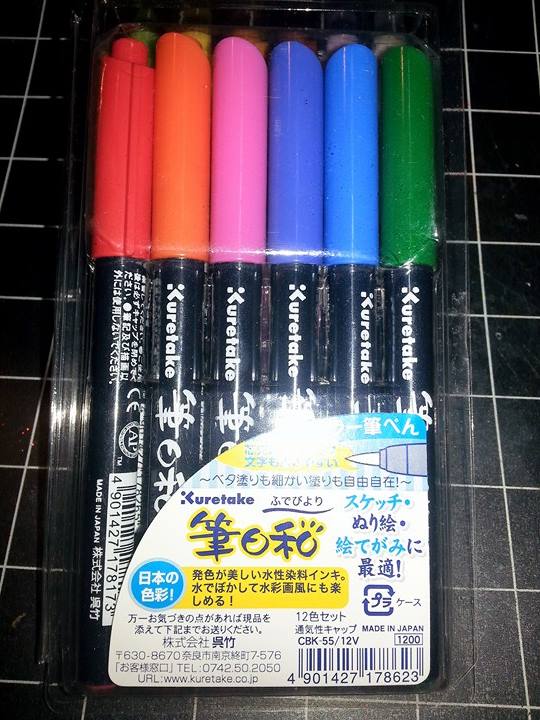
Now to talk about the Immersive Color Brush pen markers. Well, right away I liked how nicely the tear drop shape was and easily made daisy flowers and hearts. The Brush tip on the Immersive Color brush pens are more flexible soft and Medium to Thick size whereas the Tombow’s were more of a Small to Thin size. The Brush tip on the Immersive Color Brush pens resemble the tip on the Pentel Aquash Brush pens. To me these performed a lot more like an actual paintbrush. The Fine tip point is more of an Ultra Fine tip like that of a Pigma Micron pen unlike the Tombow Fine point is more like the Fine Point Sharpie marker.

The Immersive Color variety is limited to only 24 colors but it’s still a decent amount of color variety to keep you happy. Umm … like the Tombow Brush pen markers I had trouble getting these to blend with water and each other as well. But unlike the Tombow they somewhat blended. In the example chart I first scribbled down Orange then scribbled over with Yellow and the Orange did somewhat lighten to a Lighter Orange when I went over it with the Yellow. As far as blending with a water and a watercolor brush the results were the same as the Tombow Brush pens. I’ll need to experiment some more with blending using both these markers.

But the Gradient technique works great with the Immersive Color markers. I grabbed same or similar colors to the Tombow a Pink/Magenta and a Maroon/Burgundy color and I touched the Maroon/Burgundy color to the Pink/Magenta for approx. 10 seconds and you can see in the example the Maroon/Burgundy in the beginning then fade back to the Pink/Magenta color. Getting a gradient effect seems easier with these Brush pens than the Tombow Brush pens.

Now as far as Brush Lettering the Immersive Color Brush pens will require more practice in getting the thin and thick lines of Brush Lettering as I previously said the Brush tip on these pens are more paintbrush like so getting a thin line and thick line will require a bbit of practicing as far as pressure and less pressure goes. From my experience you barely have to touch the paper almost floating over or very softly brushing the surface of the paper to get the thin line but thick line is pretty easy.

Overall I like the Immersive Color Brush Pens compared to the the Tombow Brush pens because they are more affordable $19.99 for 24 Brush Pens over $27 dollars *Retail price* for 10 Brush pens. If you want to stretch your color variety and have the money go with the 96 color pack of Tombow markers. But if you’re going to use these Brush pens for Brush Lettering I highly suggest the Immersive Color Brush pens as the Brush tip gives you more weight to your letters. It just requires more practice in getting the thick and thin lines.

If you’re interested in trying out these markers … Here’s the link to them on Amazon. I think Amazon has the best price in my opinion for the Tombow Brush pens. Other sites cost twice as much as the price of Amazon. Can’t beat $16.99 with *FREE* Shipping if you spent $35 or more. The other sites that cost twice as much tack on Shipping and tax and what not.

Immersive Color Brush pens 24 colors : https://www.amazon.com/Fineliner-Duplicates-Watercolor-Sketching-Coloring/dp/B01ES37THG/ref=sr_1_1?ie=UTF8&qid=1466224528&sr=8-1&keywords=Immersive+Color

Tombow Brush Pen 10 colors “Bright Palette” : https://www.amazon.com/Tombow-Brush-Markers-Bright-10-Pack/dp/B00JVB8FBA/ref=sr_1_1?ie=UTF8&qid=1466224560&sr=8-1&keywords=Tombow+Bright

Hopefully this product review was helpful and when I get a set of Sakura Koi Brush pens I’ll do a side by side comparison to all three(3) Brush pen markers … the Tombow, the Immersive Color, and the Sakura Koi. Until next time B3 iNSPiR3D, B3 B0LD, B3 Kind, DR3AM BiG, and B3 CR8TiV ~ MYT CR8TiV

Leave a comment »

Affordable Art Tablet … (ⁿ-ⁿ)

acer_tablet_Iconia-One-10_B3-A20-preview

Hello, CR8TiV cats ! Hope you’re having a great Monday ! I think I’ve owned this tablet long enough to do a decent review on it. My husband for my Birthday got me this Acer Iconia One 10 tablet. It is a 10.1″ tablet and I am loving it for practicing digital artwork. It’s an Android tablet and runs on the Lollipop OS. I won’t go too much into the specs of it as you can just Google that yourself. But one thing I highly recommend is a 128gb micro SD memory card and a good screen protector. I haven’t removed the screen protector or film that comes on the tablet as I’m afraid of scratches and I’ve never been too good at adhering screen protectors without a mad amount of ugly bubbles.

Umm .. the tablet does come with a lot of Bloatware as most Acer products do. My Laptop turned Desktop is also an Acer and it too had a lot of Bloatware eating up memory space. It doesn’t affect the performance of the tablet too much but it does lag a bit sometimes. So far my #1 art app I use is called Painter. I’ll update this post with a list of all the Art apps I downloaded and review each of them.

The stylus I use is the Adonit Jot Pro but I also use this stylus I bought from the Dollar Tree than resembles a stubby No. 2 pencils and it responds quite nicely to the tablet screen unlike a stylus I was using for an old iPad. A lot of Art tablet users like the Huion, Cintiq, etc. wear a glove to protect your palm from reacting with the touchscreen while you draw. I was considering purchasing a glove since it’s about $6 on Amazon but my CR8TiV mind just made a DIY one. All I did was cut a thumb hole and finger holes through a sock that lost it’s partner. It works great !! It keeps your wrist and hand warm so it kinda helps prevent cramps.

Umm … I guess this isn’t really much of a review since I don’t really know what to really say about the tablet. One con that I have about the tablet is that not all Android apps are compatible with the tablet so some apps won’t work. It works great for basic web browsing, Facebook, Instagram, Pinterest that sorta stuff. A few games run fine but watching movies like I was watching a movie from YouTube the playback is a bit slow meaning the mouth movement were a bit delayed from the audio.

But definitely an excellent tablet if you want an affordable Art tablet that is a bit more affordable than say a Cintiq. The 10.1″ screen is large enough to give you plenty of space to draw and there are many great drawing apps for it. Painter being one of them ! If you wanna try out digital art like I am … this is a great practice or beginners tablet to learn with then later in the future you can upgrade to an actual Cintiq, Huion, etc. Art tablet. I just like that this one is portable so you can carry it around easily for those random moments are art inspiration.

It cost just under $16o dollars. It’s actually $139 but with tax and all that roughly under $160. So affordable than say an iPad Pro or an actual Cintiq. Comment if you wanna know something specific about the Acer Iconia One 10 tablet.

Leave a comment »

Xyron Creative Station …

IMG_5706

Hello and Happy Monday, My CR8TiV Kittens ! Life has been SOo… hectic lately but it’s finally settling down to where I can stop procrastinating about this post and as Larry the Cable guy would say … Git Er Done ! L0L

So today I want to share with you guys a Birthday present I got for myself. I always do quite a bit of research before I buy anything and I’ve done quite a bit of oogling googling about the Xyron 510 Creative Station. Of course right off the bat I loved that it’s called CR8TiV Station. 😛 L0L

But what the Xyron 510 Creative Station is  … is it’s a sticker maker, laminator, and a magnet maker. You do have to buy separate cartridges to do each of those things but you get a Permanent Adhesive cartridge to start with when you buy the Xyron 510. It applies a strong adhesive to the back of anything you place into the machine.

The machine does not require electricity or batteries … it’s a manual self crank machine. I really love the Xyron 510 bcuz as a Card maker you sometimes have intricate die cuts that are hard to get adhesive on. Most just use a glue like the Tombow Mono-Liquid Adhesive or just rub a glue stick over it. But sometimes the glue oozes out the die cut and the glue stick isn’t sticky enough to keep the die in place.

Well, with the Xyron 510 you just pass it through the machine and the intricate die cut will immediately become an adhesive die cut. You can take photos, intricate die cuts, card backing that you’re going to adhere to a cardbase, ribbon, strips of fancy scrapbook paper you wanna make into washi-tape like strips, etc. The Permanent Adhesive cartridge will put a strong adhesive on one side turning it essentially into a sticker.

Another great thing about this is if you wanna use Deco-Foil … Run your die cut through the Xyron 510 or as I call it the X510 but put your die cut in face down so the adhesive goes on the front of the die cut instead of the back. Then peel off the plastic sheet and lay the die cut down on a sheet of Deco-Foil. Use a bone folder or old credit card to rub it all smoothly. Then gently peel off the Deco-Foil and you have a Foiled Die Cut without the process of printing in a Laser Printer and running it through the Laminator or using the Deco-Foil toner pen.

Many of you who follow me on Facebook and Instagram (Facebook.com/MYTCR8TiV@MYTCR8TiV) know that I am a Artist and I often draw many things. I know many have asked why I don’t have an Etsy shop or online shop and my 1st Etsy attempt didn’t work out as I wasn’t really ready for it. But I’ll have a online shop soon in the future.

But another reason I like the X510 is that they have a Laminator cartridge which applies a clear laminate on both the top and bottom of the item you put in. They also have a Laminate/Adhesive cartridge which laminates the top and puts adhesive on the bottom. I am hoping to get both those cartridges as the possibilities are endless for me at least. I can make cute handrawn stickers with a glossy finish or I can laminate my ATC “Artist Trading Card” or Art Prints without having to go to my local Office Supply store and have them laminate it.

Then there’s the Magnet cartridge which adheres a thin magnet to the back of your project. You can turn photos into magnets, a drawing into a magnet, etc. I am sure it is possible to put your item through the laminating cartridge then again through the magnet cartridge so you have a glossy film over the front and magnet on the back. Like I said the possibilities are endless on this.

If you are a Crafter or even an Artist … I highly recommend the Xyron 510. They have a larger one I believe it’s the Xyon 900 which will take wider items like posters but the Xyron 510 I believe can take up to 5″ widths. But it’s an awesome machine to make adhesive labels for your mason jars, your cupcake/cookie box labels, and able to make customizing a lot easier without a computer or electricity.

Definitely don’t think that the Xyron 510 will disappoint and with Craft store coupons like from JoAnns and Michaels the cartridges are affordable. JoAnns sells the cartridges for $19.99 but with coupon you can probably get it for $15 or less. I hope that the 1st handful of items I put up the next time I reopen my Etsy store will be some handrawn stickers, magnets, and a few laminated prints.


Leave a comment »